A Photographer's Guide to Effortless School Portraits
As a professional photographer specializing in school portraits in the Baltimore and Towson areas, I've developed a streamlined process for capturing stunning images of preschoolers. In this guide, I'll share my secrets for achieving amazing results with minimal gear and an easy portable setup.
The Joy of School Photography
There's something magical about photographing the bright, smiling faces of young children. It's a job that brings immense satisfaction, not just from the adorable subjects, but also from providing a valuable service to families.
Affordable Excellence
One of my core principles is offering high-quality portraits at prices below what large companies charge. I believe every family deserves beautiful memories of their children without breaking the bank. To make it even more accessible, I offer a sibling discount: buy one package and get another half off!
Behind the Scenes: My Effortless Setup
Let's dive into the technical aspects of creating these portraits. With the right approach, you can achieve professional results with a surprisingly simple setup.
The Backdrop
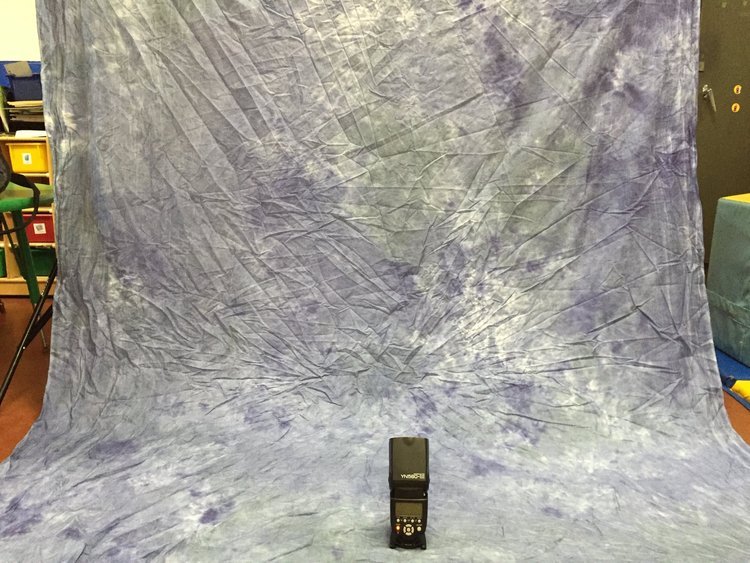
I use a blue and white or green and brown multicolored muslin backdrop for most school portraits. Here's a pro tip: don't stress about ironing out wrinkles! With the right lighting and camera settings, those wrinkles will blur into a beautiful, soft background.
Lighting Setup
I typically use one of two lighting configurations:
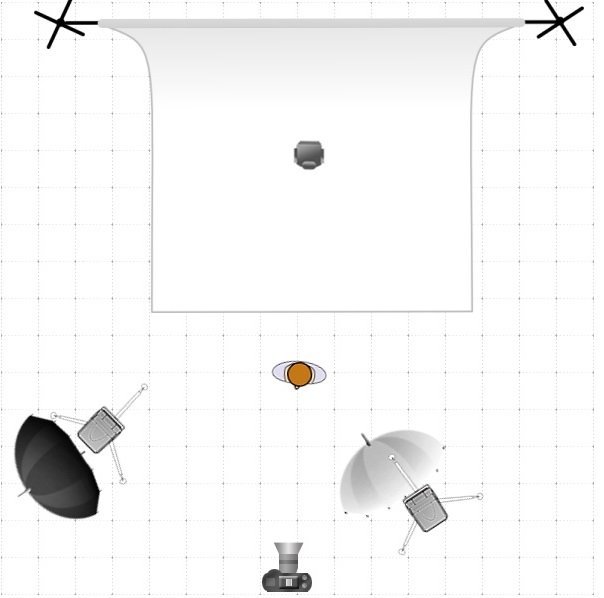
Basic Setup: One speedlight with a shoot-through umbrella for the main light, and another speedlight to illuminate the backdrop.
Enhanced Setup: Same as the basic setup, with an additional fill light (camera left) using a reflective umbrella.
This is a behind the scene of my go-to set up. The backdrop is clipped to a backdrop stand and lit with one speedlight. Now you may be wondering why my backdrop is a wrinkled mess. With this set up, the subjects are going to be positioned far enough away from the background that with a wide aperture the background becomes nice and blurry. I like to use the 85 f1.8 lens, which compresses the image and really helps the subject pop off that background. The idea of ironing wrinkles out of a backdrop, really - who has time for that? Certainly not me!
The diagram to the right shows another setup that I use. It is virtually the same setup, however, this one adds a fill light camera left with a reflective umbrella.
As you can see in both of the setup options, the subjects are lit with an off camera flash with a shoot through umbrella. Setup option 2, I add a fill flash camera left with a reflective umbrella. The key is positioning the lights at the children's eye level and angling the fill light slightly upward to soften shadows under the eyes. If you don't have a 3rd flash, you could always use the white side of your reflector or even a white poster board. That will use bounce flash for fill light and work just as well.
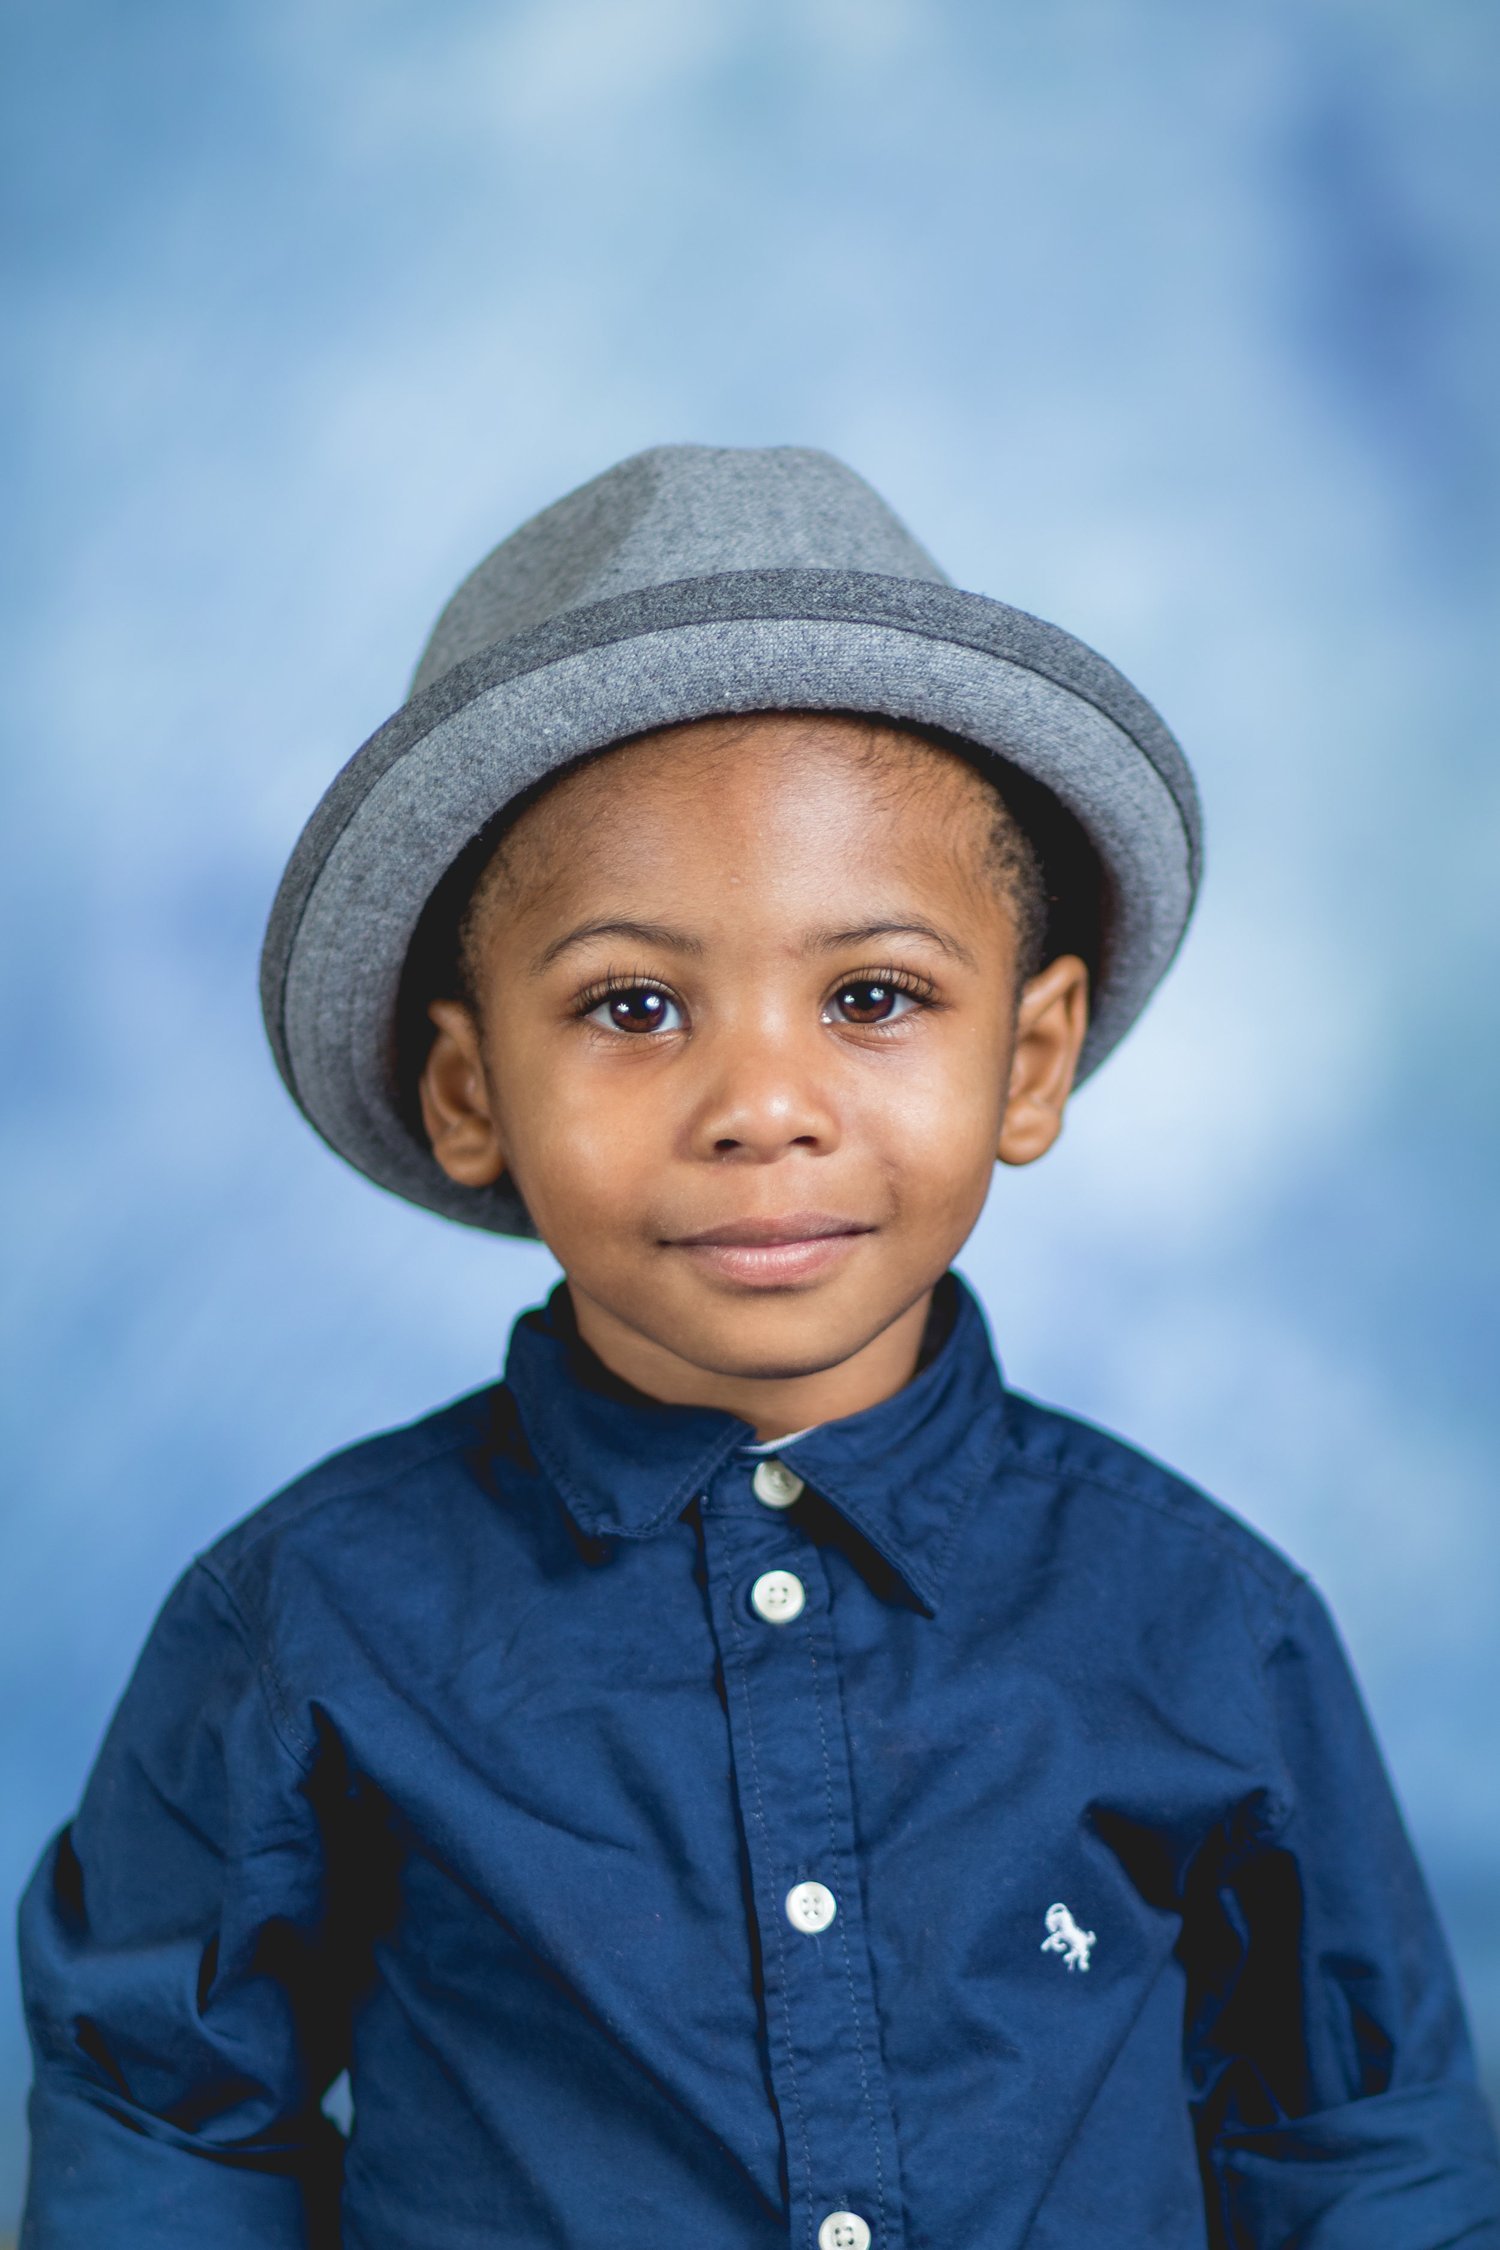
The above picture was taken with the same setup as the behind the scene example, however, I added an additional light (camera left) as the fill light.
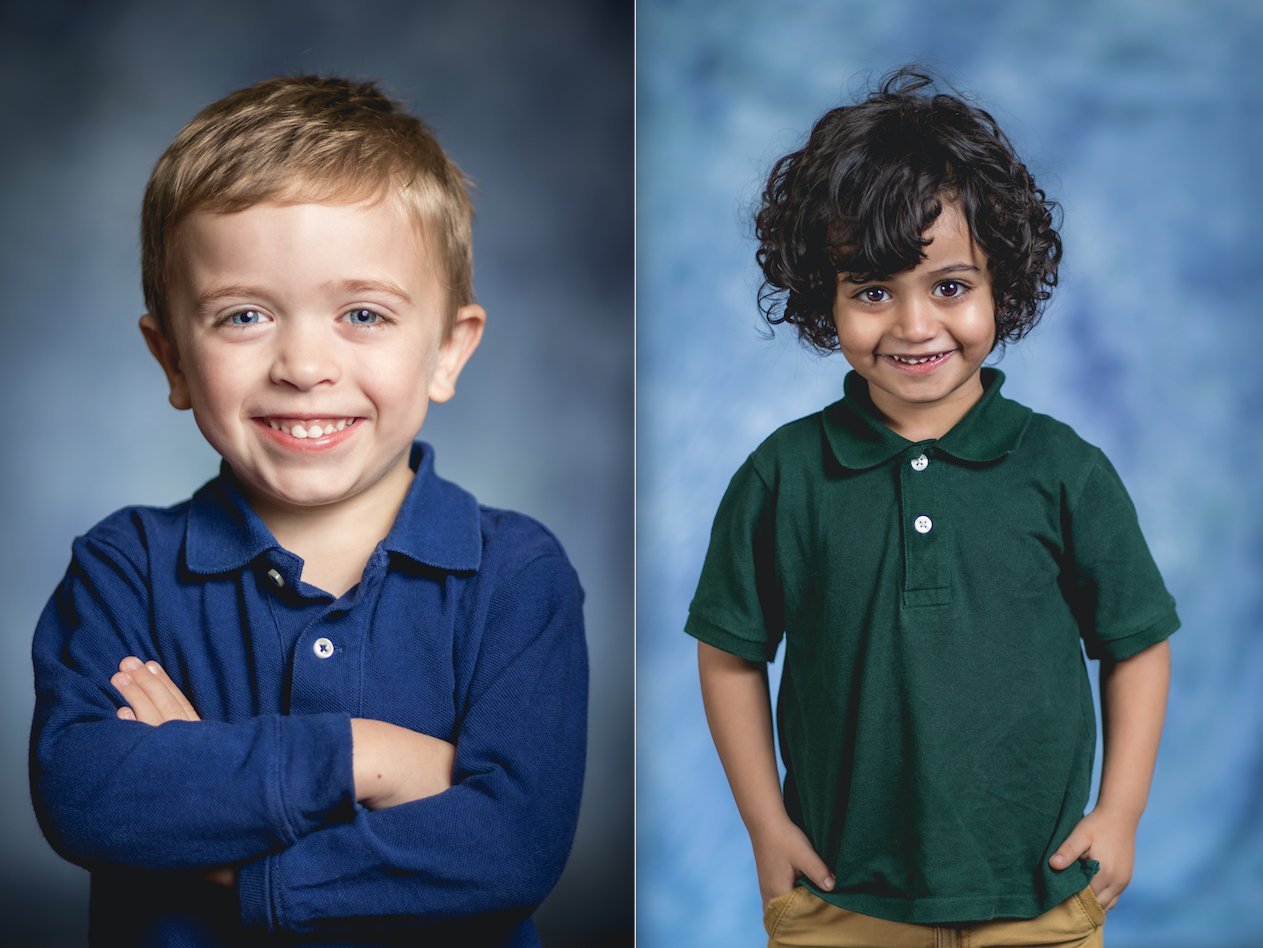
Take a look at the two images above and compare the shadows on the face. The left picture had no fill light and the shadows are darker on the left side of the face. Whereas, the picture on the right that used a fill light has no shadows on the face. For a setup including a fill light: the fill light was off camera with a reflective umbrella. The fill light was low to the ground and pointed upward, to fill the shadows of the preschooler’s face. The fill light was on lowest power setting so that it was just enough to kiss away some of the shadows without overpowering the main light source.
Camera and Flash Settings
Camera: Shutter speed 1/200, ISO 400, aperture f/2.8-f/4
Main light: 1/16 or 1/8 power
Background light: 1/32 power
Fill light (if used): 1/128 power
These settings allow you to control the light fully and create that desirable blurred background effect.
Working with Young Subjects
Photographing preschoolers requires patience, creativity, and a sense of fun. Here are some tips:
Keep poses simple: Hands at sides, in pockets, or holding cheeks.
Be silly: Use puppets or toys to engage the children.
Make it magical: Tell them their smile makes the flashes go off!
Be patient: If a child is nervous, give them a break and try again later.
Remember, the goal is to capture genuine smiles and personality.
Equipment List
For those interested in the specifics, here's my go-to gear:
Camera: Canon EOS R5 & Canon 7D Mark II
Lens: Canon 85mm f/1.8, Canon 70-200 f2.8 IS II & Canon EF 100mm f2.8 Macro IS
Lighting: 2-3 YN560 IV Speedlights
Modifiers: Shoot-through umbrella, Silver reflective umbrella & Wescott Rapid Softbox
Support: 2 Lightstands, Backdrop stand
Post-processing: Adobe Lightroom
Digital Delivery: Pixiset
Conclusion
With this guide, you're well-equipped to create beautiful school portraits that families will treasure for years to come. Remember, the most important ingredients are patience, creativity, and a genuine love for working with children.
